
 My sister and her husband, along with my spouse and I, belong to the same wine club. So, every 3 months we get the same wines. This month we got this wine.
Turn's out that this is a great one to have a rack of lamb.
So, here's the recipe that I sent her.
I made it as well to add pictures to this blog. (There is one picture that my sister sent me of her skills (or, perhaps it was her spouse's skills?) at the end of this entry.)
Enjoy!
Rack of Lamb
Buying: The rack of lamb is the whole rib chop section from one
side of the lamb, ribs # 6 through 12. Also called a ‘lamb rib roast’. One rack
will serve 2 to 3 people. Look for the purple grading stamp – should be USDA
Prime. Choice is the next grade – also very good. The purple grading stamp
should be left on the meat. Color should be fresh and deep bright red, almost a
silky sheen to it. Fat should be hard and creamy white. The eye of the meat
should be reasonably big and rounded. All the butchers I know already fully
trim (Frenching the bone ends) the roast. However, you can do this yourself as
well.
So, here is the starting point for the rack of lamb.

Prepping: You can make the rack ready to roast well ahead. After their first searing, they need no more attention for 15 minutes.
So, here is the starting point for the rack of lamb.

Prepping: You can make the rack ready to roast well ahead. After their first searing, they need no more attention for 15 minutes.
I love a mustard coating!
1 clove garlic
½ tsp salt (noniodized)
½ tsp dried thyme
2 Tb Dijon-type mustard
3 Tb olive oil
½ cup bread crumbs – I like to use Panko style
3 Tb melted butter
If it ain’t done already, trim off the excess fat. You want to remove all but a thin covering of fat.

Score the tops of the racks lightly – make shallow crisscross knife slashes in the covering fat.

Mash the garlic and salt together.
To mash the garlic, use a big knife. Here's the process.


Here's how to measure the salt.

Mashing the salt and garlic is done by scraping the knife over the mass.

Keep scraping back and forth until it looks like:

Mash in the thyme.

Use the same process with the back and forth motion of the knife.

Then beat in the mustard and oil.


Paint this mixture over the tops and meaty ends of the rack.


If prepared in advanced, may be covered by plastic and stuck
in the refrigerator. If you do this, then be sure to let it come to room
temperature (about 1 hour on the counter) before proceeding.
Cooking: Preheat oven to 500 (yes, five hundred) F and set oven
rack in upper middle level. This high temperature will sear the lamb. (I have
also seared in a frying pan, however, this oven method is easier and you have
one less pan to wash.) When oven is ready, in goes the lamb for 10 minutes. No
more, no less!!!
When time is up, slide out oven rack, rapidly spread a
coating of bread crumbs over the top and baste with dribbles of melted butter.
Turn temperature down to 400 F and roast for 15 minutes
more. Then, start checking temperature of the meat. Rosy rare is 125 F on an
instant meat thermometer, or, when pressed with your finger begins to show a
slight resistance rather than being squashy like raw meat.
When done, let it rest! If possible decrease the oven
temperature to 120 F, or use a warming oven, or let the roasting oven cool off
with the door open and check with an oven thermometer before you put the rack
back in. I like to let it rest for about 20 minutes.
Here's how mine turned out (before cleaning the crumbs off and adding the glazed carrots and other garnish to make it look nice):
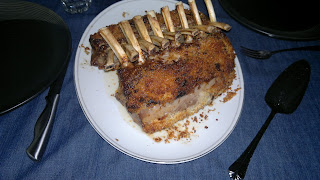
Here's how mine turned out (before cleaning the crumbs off and adding the glazed carrots and other garnish to make it look nice):

When cut, it is like:


Enjoy: If you want to make a little sauce to moisten the meat,
you can do that as well.
I like to serve with steamed carrots, perhaps glazed with
butter and brown sugar or honey.
Here's my sister's attempt. You let me know which is better.

Here's my sister's attempt. You let me know which is better.


