Saturday, January 21, 2012

If Only There was Some Coconut

Reine de Saba
[Chocolate and Almond Cake]

This project was to turn this (plus the almonds that were camera shy):


Into this:

With the main objective of figuring out which of those three bottles would go well. The middle bottle, I know would go well - in is a Muscat Canelli wine from Becker Vineyards (they call it Moscato). I also know that an orange muscat (like from Texas Hills or Flat Creek Estates) would also be really good with this chocolate.

Now, this is a fabulous chocolate cake - well, any chocolate is always good. The center of the cake is suppose to be gooey - slightly underdone - so it is nice and creamy. Hope mine is like that! As the picture shows, have covered it with a chocolate-rum-butter frosting and then almonds. And then some raspberries and blackberries were added because I like fruit. (My spouse thinks that fruit just gets in the way.)

Back to the bottles! The one on the right is a Port from Haak. Haak is located just south of Houston, so, this would make it the most local of the three. (Although, I am not sure where the grapes are grown for the Port.)

The one on the left is a Tempranillo from Texas Hills. This version uses grapes from Reddy Vineyards even though the preference are the grapes from Newsom Vineyards. Now a Tempranillo is like a Spanish version of a Cabernet Sauvignon, and a Cabernet Sauvignon usually goes well with chocolate. So, since this bottle of Tempranillo was already open, thought I would give it a try.

In other words, the sole motivation to make this cake (and eat it, too) was because there was an open bottle of wine. 

The main recipe used may be found on page 677 of Volume 1 of Mastering the Art of French Cooking.

So, follow along!

Have on hand:

6 ounces of chocolate (I like to use a mixture of different kinds)
2 sticks (that is 1/2 lb.) of butter (1/4 lb. for the cake, 6 Tb for the frosting, some to butter the cake pan)
about a cup of sugar
3 eggs
about 1/4 cup of dark rum (more if you plan to drink any along the way)
almonds (1/3 cup whole, and about 3 oz of sliced)
almond extract
1/2+ cup of flour (I used all purpose since we did not have any 'cake' flour - don't know where to find that!)
just a pinch of salt
a pinch of cream of tartar - if a copper mixing bowl is unavailable for the egg whites

To begin - before the beginning - the butter (at least the 1/4 lb for the cake and a wee bit for the cake pan) and eggs come out of the refrigerator and get up to room temperature. That can take an hour or so.

The tools of the trade for the production include:

An 8 inch cake pan about 1-1/2 inches deep that has been buttered and floured. That is, the entire inner surface has been rubbed with a thin film of softened butter (that is that room temperature stuff). Then, flour is rolled around in the pan to cover the sides and bottom. Excess flour is knocked out by banging the pan, upside down on a hard surface, leaving a lift dusting of flour all over the surface. This makes it super easy to unmold the cake.

A mixing bowl - I used the KitchenAide!
A blender - I used the Vitamix
A pan, with lid, to melt the chocolate in
A larger pan with a couple of inches of water in it that is heated to a simmer to place the chocolate pan in
A copper bowl for whisking the egg whites (no copper available? No problem - just have some cream of tartar on hand)
A rubber spatula
A cake rake (or two)
A wooden spoon
A real decent balloon whisk
A flexible-blade metal spatula to spread the frosting

Preheat oven to 350 F with the rack in the middle.

Into the chocolate pot goes 4 ounces of chocolate and 2 Tablespoons of rum. (If you like, another 2 Tablespoons, or more, can go into the cook.) The lid goes on the pot. The pot goes into the simmer water and the pot-in-the-pot goes off the heat. This sits and melts the chocolate while the rest gets underway.

The bowl for the Kitchen Aide mixer is warmed - hot water is poured into it, poured out of it, and dried.

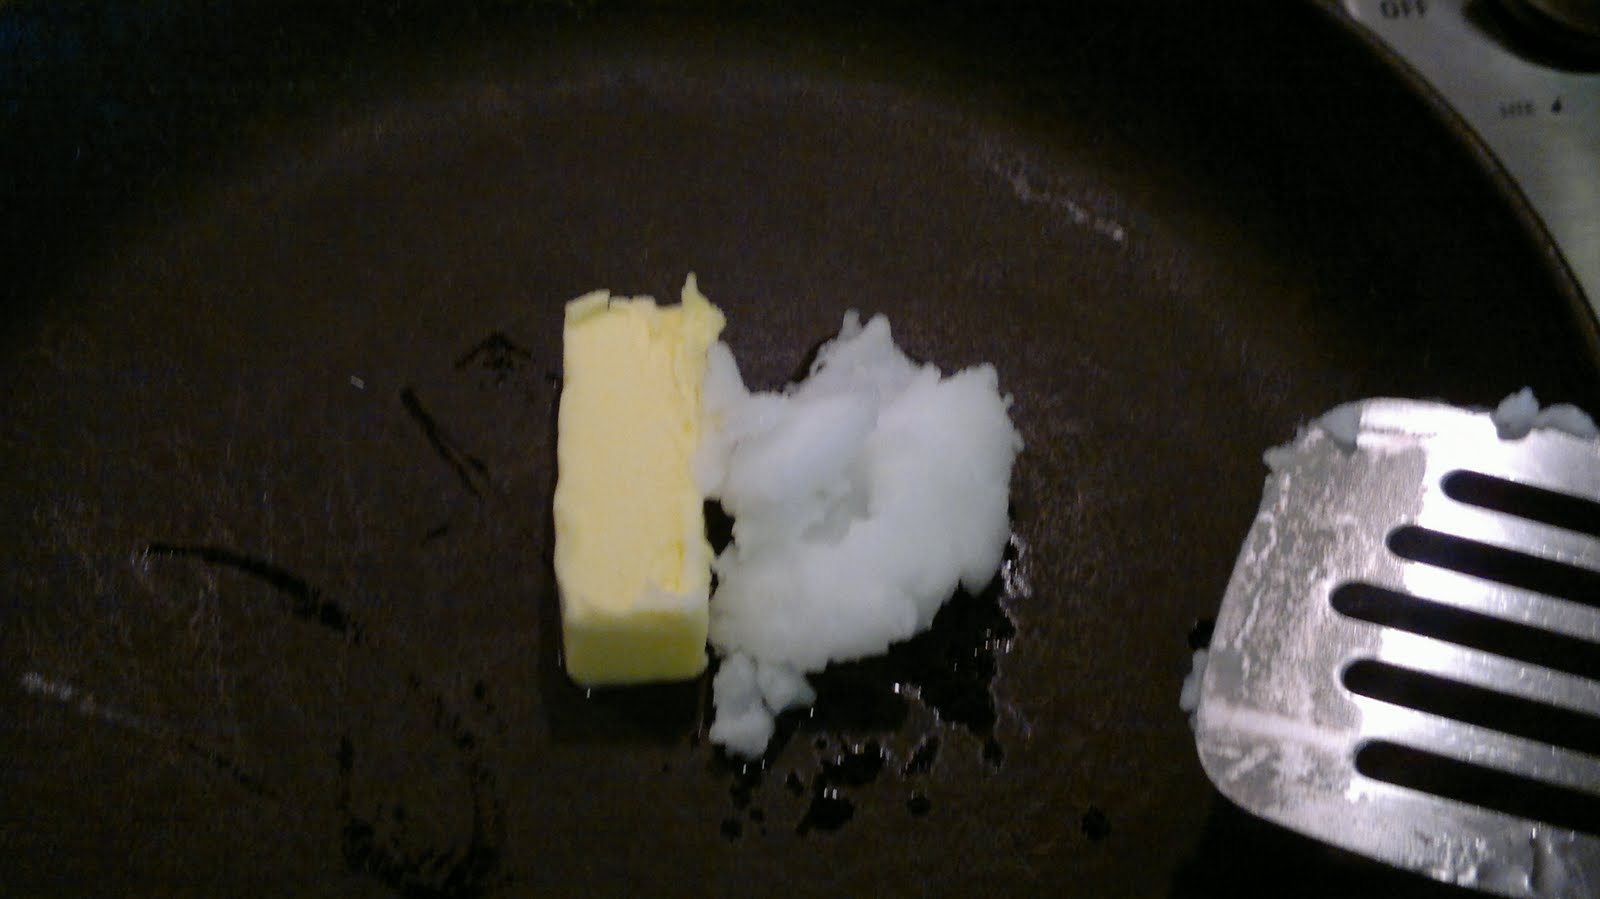
Into the mixing bowl goes the 1/4 pound of softened butter and 2/3 cup of sugar. This is creamed together for several minutes - forms a pale yellow, fluffy mixture. When it first starts out, it looks like:

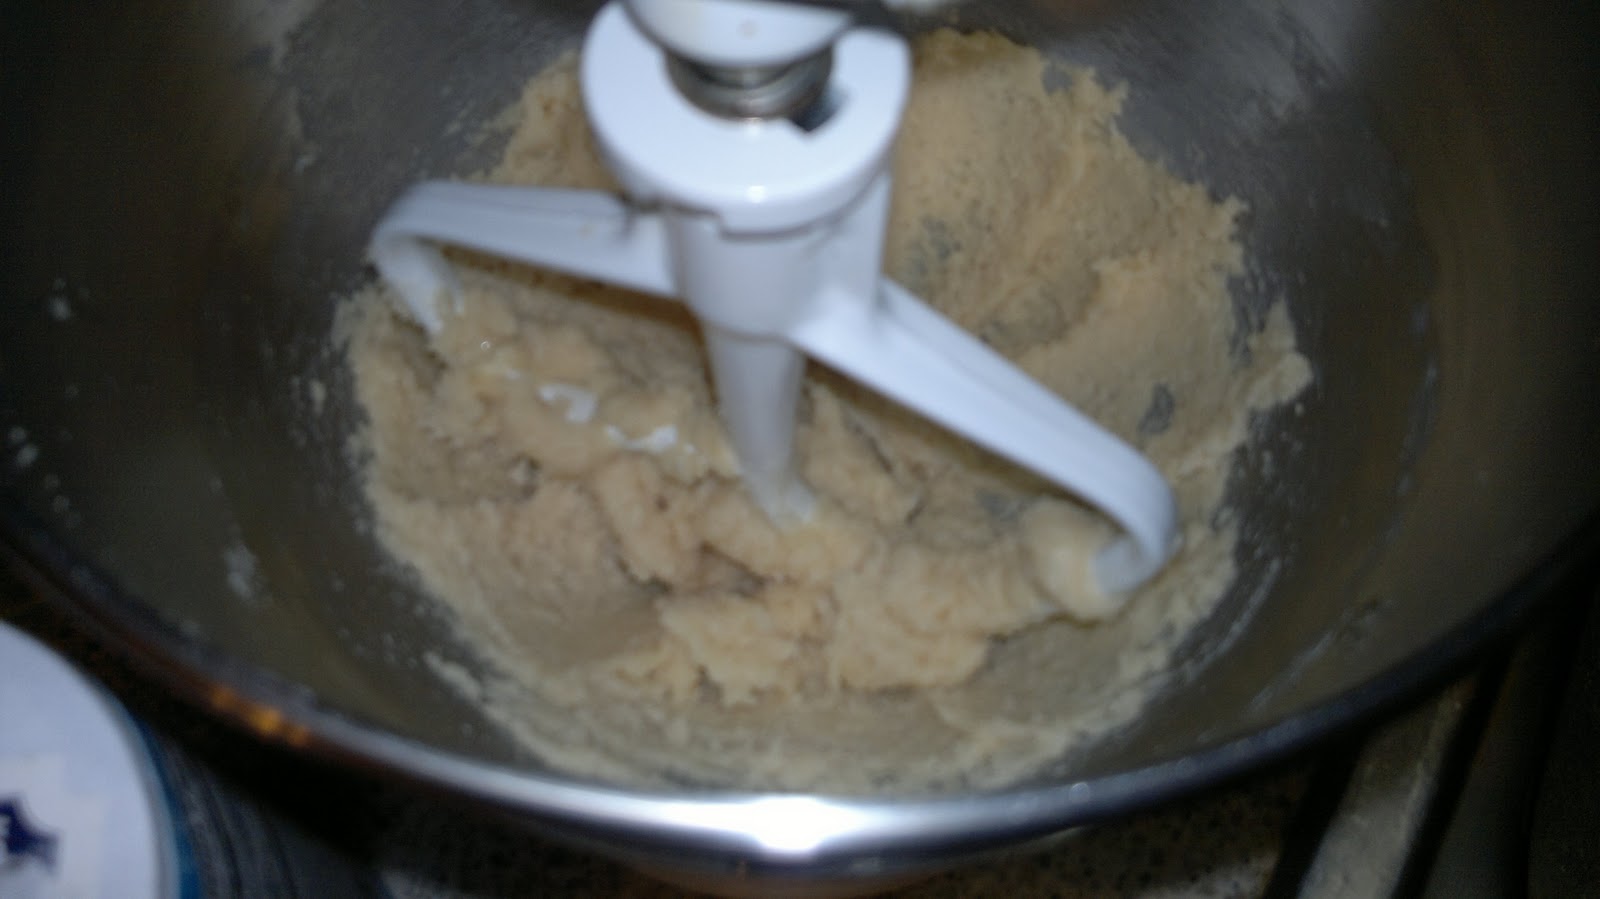
At the end of creaming, it looks like:

While that is creaming, into the Vitamix (dry container) goes the 1/3 cup of almonds along with a Tablespoon, perhaps a wee bit more, of sugar. The objective is to pulverize the almonds - not to turn it into almond butter. The sugar helps to prevent the pulverized almonds from becoming oily and lumpy. I used the 'low' speed, about 3/4 of the way up, on the Vitamix.

Here's the almonds and the sugar waiting for the lid of the Vitamix to be put on and turned on:


A little while later, pulverized almonds!

Now, back to the creamed butter and sugar. Into the mixer goes the yolks from the three eggs. And then this is well blended together.

The three egg whites go into the copper bowl for whisking. Once added to the bowl, test the temperature. If it is not room temperature, warm the bowl over the simmering hot water for a few seconds while gently stirring the eggs. Could also have let them sit in this bowl for about 20 minutes - that should have brought them up to room temperature. Now comes the whisking!

Start whisking, using the lower-arm and wrist muscles (shoulder muscles tire too quickly) at a speed of about 2 strokes per second with a vertical, circular motion. Do this for about 30 seconds. The egg whites should begin to foam. Then, add a pinch of salt and, if the bowl is not copper, add a larger pinch of cream of tartar. 

Now start whisking at 4 strokes per second, whisking in as much air as possible into the mixture and rotating the bowl so all the whites are engaged.

When soft peaks are formed the Tablespoon of sugar is sprinkled on top. Then, continue to whisk until stiff peaks are formed. This can be tested by holding the whisk upright and seeing if a peak forms on the top of it that holds upright. 

Now comes the blending!

First, take the mixing bowl off the Kitchen Aide.

Stir up the melted chocolate and rum with a rubber spatula so that it is all mixed together. Should look silky.

Now using that rubber spatula, blend the melted chocolate into the creamed butter/sugar. 

Now use that rubber spatula and blend in the pulverized almonds and 1/4 teaspoon of almond extract.

At once (immediately!) stir in 1/4 of the whisked egg whites - this is to lighten the batter.

Now, delicately fold in 1/3 of the remaining egg whites and when partially blended, sift in 1/3 of the flour and continue folding.

Do this two more times (alternating egg whites and flour) to fold in the rest of the egg whites and flour.

Pour and scrape (using that rubber spatula) the batter into the cake pan. Push the batter over to the sides.

Into the oven!


Around 22 to 23 minutes later, start testing with the cake tester needle. When the cake has puffed up and when the needle plunged into the cake about 2-1/2 inches from the edge comes out clean, it is done. When the needle is plunged into the center, it should come out oily. And, when the pan is shaken, the center should jiggle slightly.

Onto the cake rake to cool for 10 minutes:


Then, out of the pan and left on the rack to completely cool. At least 2 hours! Don't even think about frosting it until it has completely cooled. It is a butter-based frosting and if the cake is warm, it will be a disaster!

For the chocolate-butter icing (GLAÇAGE AU CHOCOLAT, from page 684):

2 ounces of chocolate (I used a dark chocolate)
2 Tablespoons of rum (again, more for the cook)
6 Tablespoons of butter (room temperature)

chocolate melting pan with lid
larger pan with simmering water
bowl with ice water
A wooden spoon
A flexible-blade metal spatula

Melt the chocolate with the rum like usual. That is, place the broken up chocolate in the pan with the rum, place the lid on it, and place the pan in the simmer water and remove from heat. in about 5 - 10 minutes the chocolate has melted. Take the pan out of the hot water, add the butter that has been cut into small cubes (about a dozen or so), adding just a few cubes at a time while stirring with a wooden spoon. If need be, place pot back in the hot water to help melt the butter and blend it in:


Once all the butter is melted and blended, place the chocolate pot in the ice water and continue to stir until the icing is the spreading consistency.

This is what it looked like when it was first placed in the ice water.


Here it is after cooling, ready to go on the cake:


And, here it is on the cake!


And, here is the pot ready to be licked!


Now, if I had coconut - that would be pressed into the sides of the cake as part of the decorating process. As shown in the picture, I only used almonds (and fruit - to my spouse's chagrin) for decorating.

With coconut, along withe chocolate and almonds - this would have been a joy.

An Almond Joy.


UPDATE! Port wins.


UPDATE #2! Spouse prefers this - pure joy.

Tuesday, January 17, 2012

Makin' the Bacon! (Lardons)

May recall that the Beef Bourguignon called for lardons that are basically unsmoked bacon and that I was challenged by Chris the butcher to cure my own. Well, yesterday I took the final steps.

Two days ago, the pork belly had been curing for 6 days. It was time to wash it in fresh water and let it rest for 24 hours. So, out of the refrigerator comes:


After the 24 hours in the refrigerator, out it comes one hour prior to the oven and is dried in paper towels. Then, into a preheated 200 F oven until the internal temperature reached 150 F. That took about 1-1/2 to 1-3/4 hours. Then I sliced it into 1/2 inch thick chunks:


These 10 pieces are now in the freezer ready to use! When needed, out them come and will be chopped into 1/4" pieces cross-wised. No nitrates! No smoke flavor!

Saturday, January 14, 2012

Le Gâteau Victoire au Chocolat, Mousseline

FLASHBACK!!

It's been about 20 years (plus - but, who's counting??) since I have made this dessert. A lot has happened since then, that is for sure! So, if you want to follow along, get a copy of Julia Child & Company and turn to page 187.

Objective: Turn this:

In to this:

No problem! Takes a bunch of different chocolates, six eggs (get em to room temperature before you start!!), sugar, vanilla extract, instant coffee, heavy cream, and rum! Those ingredients are:

1 Tb instant coffee
4 Tb hot water
4 Tb dark rum
14 ounces of semi-sweet chocolate
2 ounces unsweetened chocolate
6 large eggs
1/2 cup sugar
1 cup heavy cream
1 Tb vanilla extract
Confectioner's sugar that will be sprinkled on top

Wait - no flour? Yep, no flour. The only flour used is for dusting the cake pan after it has been lined with waxed paper and butter.

Equipment used:
  1. hand whisks and spatulas
  2. scale for weighing out the chocolates
  3. electric hand mixer with beater blades (for the eggs and sugar mixture) and a whisk blade (for the heavy cream)
  4. assorted bowls (two for whipping the cream as one will have the ice water in it, for the eggs, for blending it all together)
  5. two pots of hot water (one for the chocolate pot, one for beating the eggs over)
  6. the roasting pan with sufficient hot water in it so the hot water will come halfway up the cake pan when the cake pan is placed in it - this roasting pan, with the water, is placed in a 350 F oven
  7. a cake pan (I used a 10" spring form) that will hold 10 cups
  8. a sieve for sprinkling the confectioner's sugar
Yes, I did use a 10" spring form pan. Now this pan is going to go into a water bath, so, to ensure that water would not seep into the pan, I covered the outside of the pan with one sheet of aluminum foil, ending up with the batter inside a floured/buttered waxed paper lining in a spring form pan, in a continuous piece of aluminum foil that is going to go into the water in the roasting pan in the oven.

Lesson learned this time: for the sides of the pan, cut the waxed paper so that the waxed paper is taller than the pan! Had an issue - when the cake expanded, it went higher than the waxed paper so when in fell (yes, it will fall, in a controlled manner) some of it got caught up over the waxed paper and did not collapse correctly.

So, first the chocolate is broken up (breaking up is really not that hard to do) placed in the pot that has the hot water and instant coffee that was swirled together with the rum. This looks like:


Then, just cover this pot and place it in the pot of boiling water, turn off the heat and let it sit there while you take care of everything else.

For the beating of the eggs, I love to use a copper bowl. The bowl is placed over a pot of hot water. First, break up the eggs with a fork, stir in the sugar and stir this mixture, still with the fork, until they are warm to the touch. This is to help them increase in volume. Then, put the fork down and pick up the hand mixer and beat the eggs for about five minutes. The eggs will triple or more in volume! And, they will have the consistency of cream that has been slightly whipped. Here is what it looks like at the end:


Then, whip up the heavy cream in a bowl that is in a bowl of ice water.

Note to self! Use a bigger bowl so the cream doesn't get flinged all over the kitchen!!

Cream should end up, in the bowl, so it forms soft peaks. Then whip in the vanilla extract.

Then, whip up the chocolate mixture so it is nice and silky.

Now fold the chocolate into the eggs/sugar and then fold in the cream. It should end up like this:


Wait a minute - that is not a copper bowl.

Good observation! The copper bowl just wasn't going to be big enough, and, after the cream being hurled all over the place, a bigger bowl was called for.

The batter is poured into the prepared pan and then the pan is placed into the roasting pan that was already in the lower 1/3 of the 350 oven. When the batter is first poured in, it only fills up somewhere between a 1/3 and 1/2 of the pan. It will expand during the hour of baking time. Looking through the oven after about 45 minutes, it looks like the center is even above the top of the pan:


So, after baking for one hour, the oven is turned off and the door is open a wee bit (a jarred) and it is left alone for 30 minutes. This is to allow it to fall in a controlled manner.

After 30 minutes, the roasting pan with the cake still in it, is removed from the oven and placed on the counter to cool further. This sits for another 30 minutes.


Note how the cake has fallen and is now below the top of the pan. We are now 2 hours after the batter was first placed in the pan and the pan was placed in the roasting pan that was in the oven.

The cake pan is now removed from the roasting pan and the aluminum foil is removed.

Before unmolding, I take a very, very, very, very, very, very, very, very, very sharp (that is extremely sharp!) knife that is super clean and slice the cake. Slicing it this way, before unmolding, helps the cake to stay together.

Now I take off the spring form, but, leave the cake on the bottom of the pan. It is just too fragile to try and move it off the bottom.

Then, take a sieve, put a wee bit of confectioner's sugar in it, and gently shake it over the cake. Decorate with raspberries and place on a serving tray. Once there, I take a paper towel, actually several, and start blotting up any water that has formed or collected on the side of the cake. This can take several minutes but it really makes it look nice, like:


What is that wine doing there? Well, it is to be enjoyed with the cake! Here's the label:


Serve it cold. Goes great!! This is a sweet and balanced wine with fruity, floral and honey aromas.

Yes, you could serve coffee with it. Give a wine a try!

Sunday, January 8, 2012

Boeuf Bourguignon

The goal is to to turn this:

Into this:


The guide is found on page 315 of Mastering the Art of French Cooking, Volume 1.

So, if you got that book, follow along!

But, first, notice that the carrots in the top picture have their tops! Lesson - these type of carrots usually have more flavor than the ones in the bags.

The first thing that the book calls for is lardons, something that is just not found that easily. The book says to take some slab bacon and simmer it for 10 minutes in water. This takes the smokey flavor out of it. (If the smokey flavor is left in, it would overwhelm everything.)

Well, first, good luck with finding slab bacon.

Ok, bacon is pork belly, a bunch of pork fat with some streaks of pork meat, that is cured (basically desiccated with salt and spices and nitrate) and then smoked. (BTW - nitrate is added to ensure that botulism is not formed during the smoking process.)

So, what about some other really fatty pork that has not been smoked?

Enter pancetta. Pancetta is Italian bacon - salt cured and seasoned with nutmeg, fennel, peppercorns, other peppers and garlic. It ain't smoked! But, again, if you can get it in slab form, good for you!

So, how about another part of a pig? Like, the jowls! Or, at the deli it could be La Quercia Guanciale, or, Italian pork jowl bacon. Found that!

Cutting the rind off and cutting into the lardons - sticks that are about 1/4 inch thick and 1-1/2 inches long - it looks like:


Fabulous. (That is the rind of the jowl on the right.)

Now for the main cut of meat. Here is a member of our butcher team, one of the guys that works with Chris, cutting a chunk off a grass-fed rump roast:


Also , highly recommended to get to know your butcher! They know meat. In fact, I was chatting with Chris about cured but not smoked bacon. He challenged me to cure one myself! So, here is the pork belly (actually a wild boar belly, about four pounds) that I purchased from him after I removed the rind (freezing that in strips to add flavor to stuff later), the membrane and some cartilage:


The rind is to the upper left, the membrane in the middle and the cartilage in the lower left. Then, I rubbed 1/4 cup of kosher salt

(not sea salt - it is too coarse, nor table salt - it is too fine, BTW - always use iodine free salts when cooking. Iodine could give a metallic taste to the food.)

along with a bunch of coarsely cracked black peppercorns and a 1/2 tsp or so of rosemary that has been severely bruised using a mortar and pedestal. The future cured bacon (but not smoked) now looks like:


This is now covered and in the refrigerator, to be checked everyday for at least six days. Every time it is checked, the liquid that comes out of the pork belly (notice that this is a marinating plastic container that has the ridges on the bottom that enables the meat to stay out of the juices that are coming out in the desiccation process) is drained off and a wee bit of more salt is rubbed all over the meat. Don't use a metal container! The salt and metal just don't agree with each other.

Ok - next time this dish is made, homemade lardons will be used! Once this home-cured bacon is ready, it will be sliced into 1-1/2 inch slabs and frozen.

So, back to the process of making Boeuf Bourguignon.

Gotta get all the ingredients ready. The rump roast is cut into 2 inch cubes:


Then, each piece is dried with paper towel. The meat must be dry!! If it ain't dry, it will be steamed rather than browned when placed in the skillet.

The herb bouquet is made for the small onions (fresh bay leaves, some thyme and parsley in a washed cheesecloth that is then tied up).


All those tiny onions are peeled. (Note to self: next time start with onions that are about 1-1/2 inch in diameter. These were just too small!)

To peel these, plop them into boiling water for one minute. Then use a slotted spoon to retrieve them, slice of the tops and bottoms and the skins should come right off. Also, cut a cross into the bottoms, as much as 3/8 inch deep, to help prevent the onions from blowing up when they are braised.


The tied up herb bouquet is next to the bowl of onions since it will be used with the onions.

All the mushrooms are washed and quartered. The 2 TB of flour is measured into a small bowl. A medium size onion is sliced and a large carrot is sliced up. the 2 cloves of garlic are mashed and placed in a bowl with the 1/2 tsp of thyme and a crumbled up bay leaf.

If you are keeping track in the book, I do not use the 1 Tb tomato paste - it is an optional ingredient and, one of the folks that will obtain pleasure from this dish cannot handle the acidity of processed tomatoes.

Into the skillet goes some butter (btw - always use unsalted butter when cooking) and coconut oil:


Then, when it is nice and foamy and bubbly, like this:


in goes the lardons to brown. Once they are brown (takes up to 5 minutes sometimes although the go-by is 2 - 3 minutes) out they go into a big ceramic bowl.

Then the dried cubes of rump roast go in, a few pieces at a time, until they are brown on all sides. The browned ones go into that ceramic bowl with the browned lardons.

Now, preheat the oven, with a rack at the lower third and a rack in the middle, to 450 F.

After the meat has been browned, in goes the onion and carrots and they are browned. This can take up to 10 minutes.

Now all the lardons, meat, onion and carrots go into a dutch oven. Salt and pepper (1 tsp or so of salt and about 1/4 tsp of pepper) are added and the mixture is tossed.

Then dust the top of the mixture with the 2 Tb of flour and toss it again.

Then into the 450 F oven, on the middle rack, for four minutes, uncovered. Toss the meat and return to oven for four more minutes. The goal is to cook the flour - it should brown.

Then, out of the oven. Move that middle rack out of the way as the next time the dutch oven goes in, it goes on the lower third. Turn the temperature down to 325 F.

Add the full bottle of the wine. This should be a young, red table wine. The goal is to add flavor. Then, add some beef stock - just enough to cover the meat. Then add that small bowl of mashed garlic, thyme and bay leaf. Toss the rind from the bacon in there as well for added flavor.

Now cover the casserole.

Set it in the over and do not touch for 3 hours.

In the meantime - on to the onions and mushrooms!

The onions are first browned in a skillet. So, first melt some butter and coconut oil and when it is ready (see photo above), add the onions:


Lesson Learned - this skillet is too big for this! should be a 10-incher or smaller!

Shake the frying pan to roll the onions around. The goal is to evenly brown them. This can take up to 10 minutes. If the onions were not properly peeled, the outer peel will be shed during this browning process. These peels can be easily removed from the pan:


Once browned, pour in enough beef stock to come halfway up the onions. The onions are going to be braised in the beef stock. Toss in the herb bouquet and cover. Reduce heat!! Let it simmer for 40 minutes or so.

Once the onions are done, place them in a bowl and cover. Then, onto the mushrooms!

The washed, dried and quartered mushrooms (again, dried - the objective is to brown, not steam, the mushrooms!) now have our full attention.

Melt some butter and coconut oil in the skillet again. Then, in go the mushrooms:


Toss the mushrooms and shake the pan during the browning process. The whole process can take 5 to 10 minutes, depending how brown you want them. This is a mixture of three different types of mushrooms, I like variety.

Once the mushrooms are done, place them in the covered bowl with the onions.

Now there is some time left to clean up all the pots and pans and dishes while the casserole continues to cook in the oven.

Also, heat up water to boil some fingerling potatoes. In a separate pot, heat up just a wee bit of water to braise some carrots.

Once the three hours are up, test the meat - it should be tender.

Remove each piece of meat and lardon and place in the big ceramic bowl. Pour the contents of the dutch oven through a strainer into a large enough pot to hold the juices. and skim off the fat.

Then, boil the heck out the strained juice:


The objective is to reduce it down to about 2-1/2 cups. Skim off any foam that forms on the top. Once it has been reduced, it should coat a spoon pretty darn easily.

While the sauce is reducing down, boil the fingerling potatoes until tender, about 20 minutes, in an uncovered pot. Also, braise sliced carrots (I like large chunks of carrots that are sliced on an angle), about 15 minutes, in a covered pot.

Once the carrots are tender, pour out any remaining water. Add a Tablespoon of butter to the pot with the carrots along with a couple of Tablespoons of brown sugar to glaze them.

Now, everything but the potatoes and carrots can be made a day ahead of time. If so, combine everything into the dutch oven, allow it to cool, cover it and place it in the refrigerator. Then, take it out of the refrigerator about an hour before serving. About 30 minutes before serving, bring to a simmer (that should take about 20 minutes) and simmer for 10 minutes. The potatoes and carrots can be made at the same time.

You can arrange the potatoes along the edge of a deep dish, place all the meat in the middle, pour on some of the sauce, place the rest of the sauce in a gravy bowl, place the glazed carrots on top of the meat and garnish with chopped parsley.

Enjoy this with a good, full body red wine, such as:

Wednesday, January 4, 2012

Why?

Why blog?

Because they asked me to.

They want to experience the experiences without making those mistakes. Well, at least not the same mistakes.


They think I know how to make a salad, and other items.

Most of the time it is trial and error, cuz, I just never know how it will turn out. Food as well as other life needs.


So, this is to capture some of those experiences, cooking as well as life, what turns out well and, perhaps, lessons learned along the way. The recipe, or the plan, at the finish line is never the one at the starting line. This is to capture the one at the finish line - well, maybe there is never a finish line - maybe it is just the 80 percent line. Ingredients vary, timings vary (based on room temperature, humidity, taste differences and a bunch of other issues), strength of seasonings vary, etc. etc. etc. Life changes. Planning is 80 percent anyway. That last 20 percent is always going to be different.

My sister, whom I truly like to antagonize, may appreciate the effort that truly goes into correctly preparing food. Of course, her life, like my life, is unique. That last 20 percent changes.

I will give examples of this along the way.

So, enough for now, for the start.

Stay toon'ed!